
PC Cases come in a variety of shapes and sizes, the most popular of course being standard ATX format sized cases as they will fit pretty much all form factors of motherboards and can hold many components. The SFF or Small Form Factor case is a somewhat specialized case that is meant to have a small footprint and be portable if need be. SFF cases became popular with gamers so they didn't have to carry full-sized heavy cases with them to LAN parties, but with the popularity of Home Theater PCs, these same cases are finding a new use as the center of our home entertainment systems.
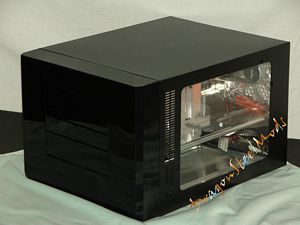
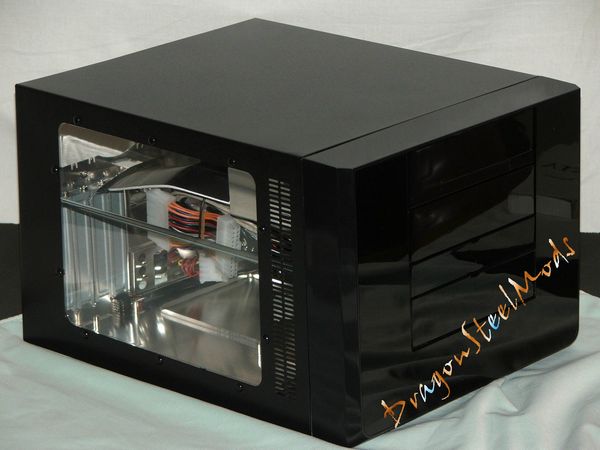
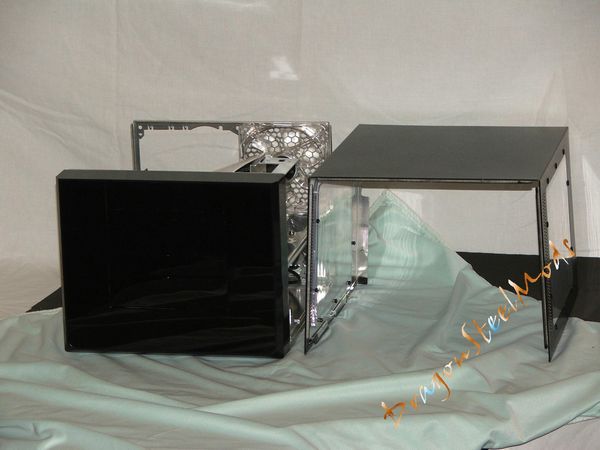
Today for review I've got the b-Envi SFF case from Bgears and it's a nice case overall packed with several cool features like a built in removable 2.5” hard drive enclosure, 58-in-1 card reader and quiet 120mm fan. The b-Envi is an all aluminum case making it very lightweight and portable with room for two hard drives and one optical drive. The first thing that struck me about this case was the fact that there are no buttons on it, it features a touch sensitive panel with 'buttons' that light up to be touched when you want to power of/off or reset the system, it even has an automatic locking mechanism so the 'buttons' can't be accidentally touched.
So, let's just jump right into this and check it out…
Bgears b-Envi SFF Case Review
Author: Kristofer Brozio
Sponsor: Bgears
Tech Specs,Features or the Basic Info:
(The Model I am reviewing today is the b-Envi which has two side windows, one on each side, there is a model, b-Envi-nw, that features solid sides or no windows)
Model Description:
b-Envi
– 1 x120mm Blue LED rear Fan included
– 2 side windows top cover
Features:
– Compact Portable Stylish Design
– Touch Sensitive buttons (Power/Reset/Lock)
– Front built in 58-in-1 Card Reader
– Front built in 2.5” Removable Aluminum IDE HDD Enclosure.
(SATA HDD PCB Card Sold Separately)
– External USB cable included for 2.5” HDD Enclosure portability
– 3 x USB 2.0 Ports. Audio/Mic.
– Flip Down Door to prevent dust
– Mirror finished Front Bezel
– Aluminum 1.0 Chassis
– Removable Motherboard Tray
– Include 1 x 120mm fan (Blue LED Fan or Black Fan. See Detail in Model Description)
Specifications:
Type: MicroATX Desktop
Case Material: Aluminum 1.0 Chassis with ABS plastic front panel
Power Supply: Not Included
Motherboard Compatibility: Micro ATX, Baby AT
With Side Panel Window: Optional (See Model Description)
External 5.25" Drive Bays: 2
External 3.5" Drive Bay.: Slot replaced by 2.5" Removable IDE HDD Enclosure.
(SATA HDD PCB Card Sold Separately.)
Internal 3.5" Drive Bays: 2
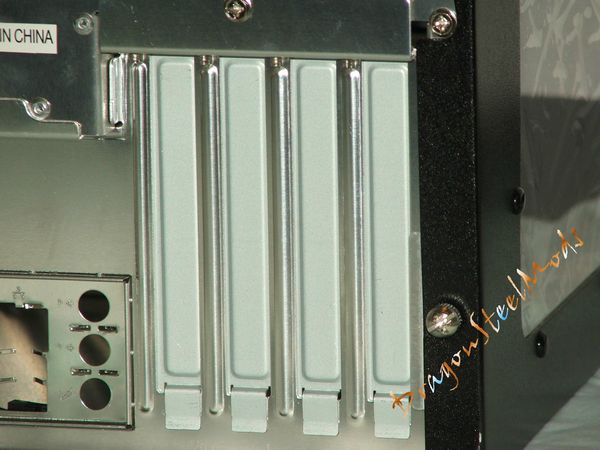
Expansion Slots: 4
Input Current: 0.3A (max)
80mm Fans: Not Included
120mm Fans: 1 x 120mm Rear Fan (See Model Description)
Side window: 2 clear Acrylics side window Top Cover
Dimensions: 9" x 11.2" x 14.7" (H x W x D)
Weight: 8lbs
58-in-1 Card Reader Spec:
CF I, CF II, CF 3.0, Extreme CF, Extreme III CF, ULTRA II CF, HS CF, XS-XS CF, CF ELITE PRO, CF PRO II, IBM MD, HITACHI MD, MAGICSTAR, MS, MS PRO, MS DUO, MS MG, MS MG PRO, MS MG DUO, MS PRO DUO, MS MG, MS MG PRO, MS MG DUO, MS MG PRO DUO, MS Pro parallel mode, Extreme Ms pro, Extreme III MS PRO, ULTRA II MS PRO, HS MS MG PRO, HS MS MG PRO DUO, HS MS PRO DUO, MS ROM, MS Select, SD, Mini SD, HS Mini SD, Extreme SD,SDHC, Extreme III SD, ULTRA II SD, SD-ULTRA-X, ULTRA SPEED SD, SD PRO, SD ELITE PRO, HS SD, MMC, MMC II, HS MMC, RS MMC, ULTRA RS MMC, DV-RS MMC, HS RS MMC, SM SM RAM, eXcellent Digital, eXcellent Digital 1.2, TranFlash, Micro SD, XD Ready.
Support – Compact Flash: Yes
Support – Memory Stick: Yes
Support – MMC: Yes
Support – SD: Yes
Support – SmartMedia: Yes
xD Ready: Yes
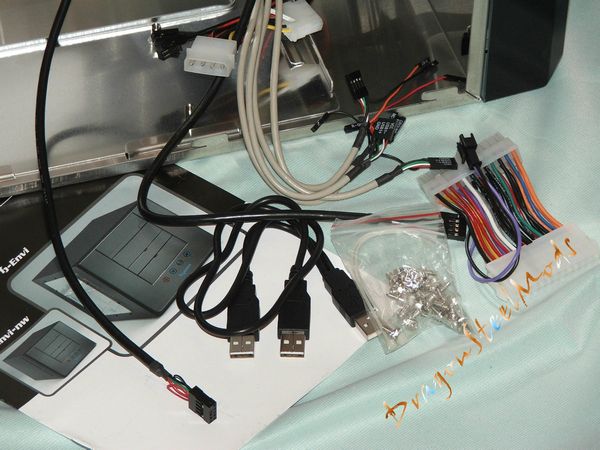
Accessories:
– Manual
– 2.5" HDD Enclosure
– External USB cable for 2.5" HDD Enclosure Portability
– Internal USB cable for 2.5" HDD Enclosure
– A Bag of Screws
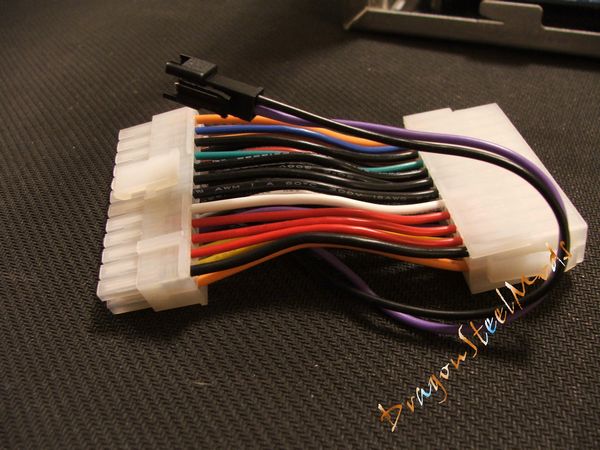
– A 20/24 pin Power adapter cable with 2 pins cable connector for Front panel Touch buttons (Power/Reset/HDD/Lock)
Manufacturer Warranty:
Parts: 1 year limited
Labor: 1 year limited
{mospagebreak title=
A Better Look at Things
-Outside}
A Better Look at Things
-Outside:
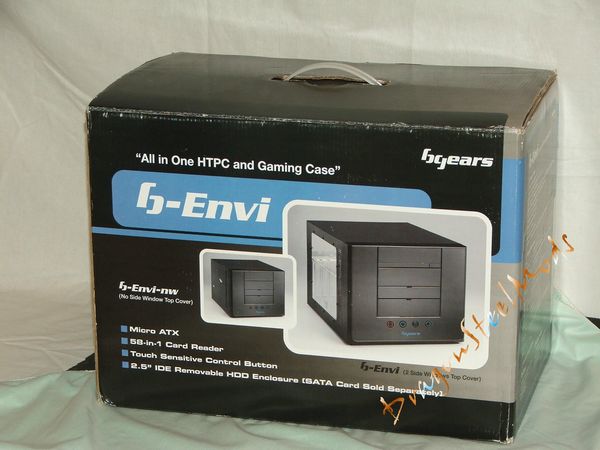
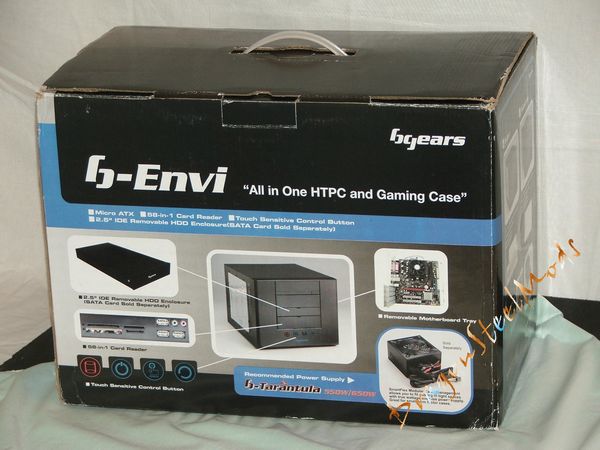
The box for the b-Envi is nicely down and packed with information and pictures all over it, it even features a nice carry handle as well.
The case is packaged very well, wrapped in plastic and surrounded by styrofoam for protection.
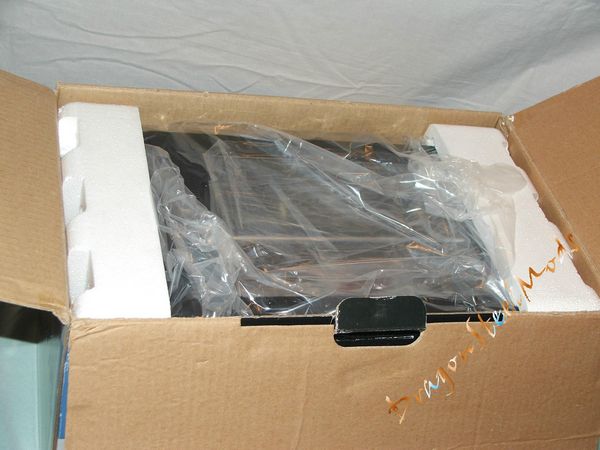
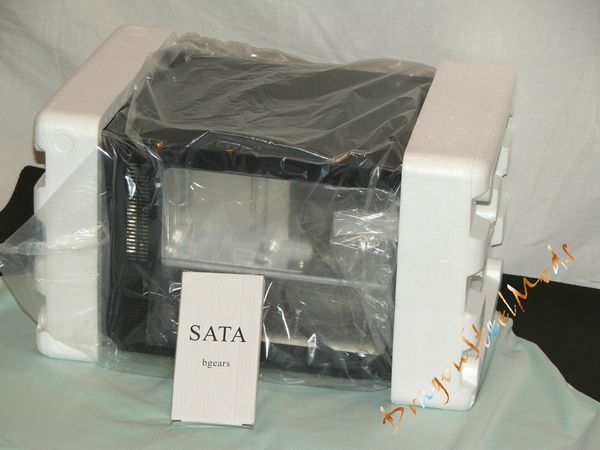
The case windows and front bezel come covered with plastic to protect it from scratches, the windows actually have plastic on both the outside and inside.
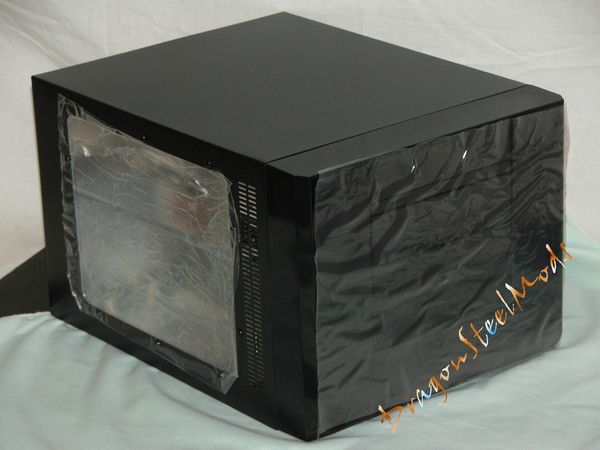
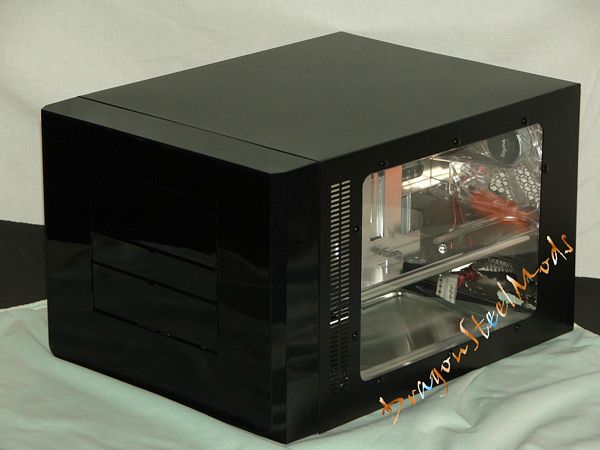
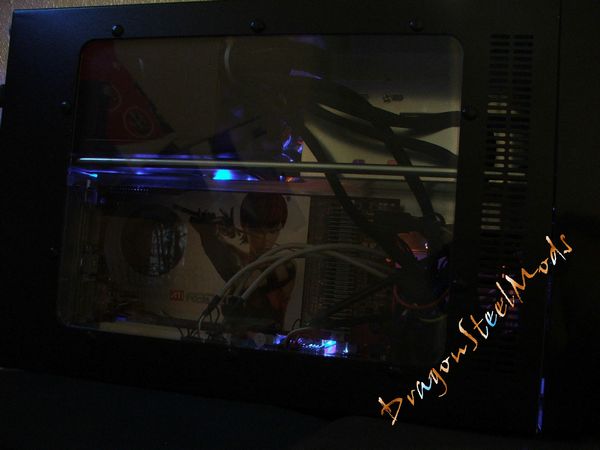
Looking at the b-Envi from the front it looks rather plain, the first thing you'll notice is the buttons or lack of them actually, in the installation section we'll look at them more closely. The portable enclosure and card reader are behind doors, and the optical drive bays have spring loaded doors on them as well. Overall it makes for a very nice presentation from the front. There are windows on both sides of the b-Envi, something you don't see all that often on a PC case, but it makes for a very nice look when everything is installed in the case. On both side of the case in front of the windows are ventilation slits that run down the sides as well to help keep your system cool.
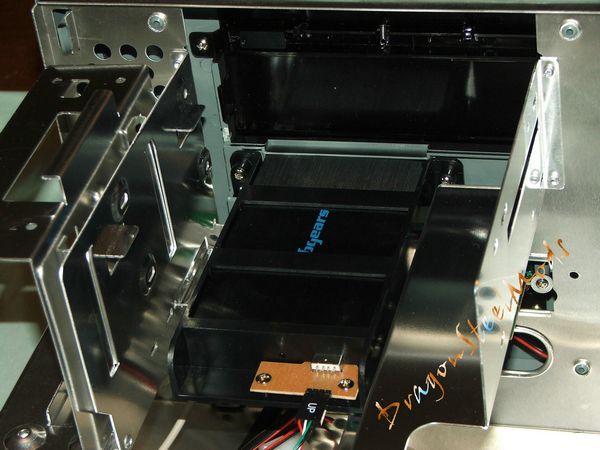
Below the two optical drives you'll find the 2.5” removable enclosure hidden behind one of the doors, there are finger slots on both sides to grip the enclosure and pull it out of the case.

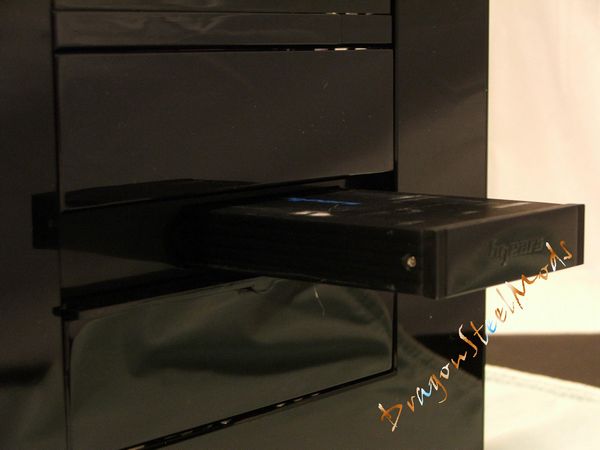
The enclosure itself is very nice looking with the bgears logo on the top and on the front bezel, it is made of aluminum so it will help keep your drive cool.
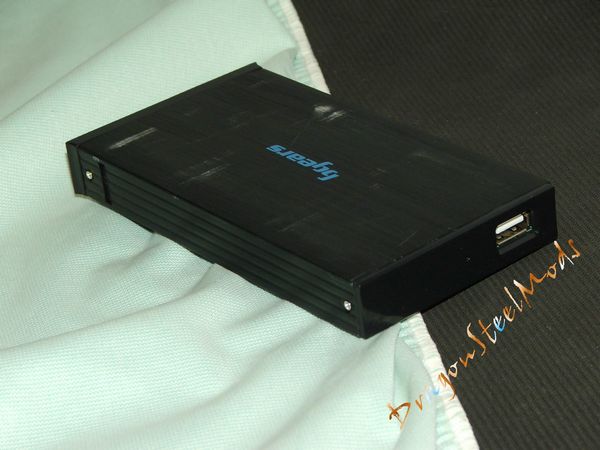
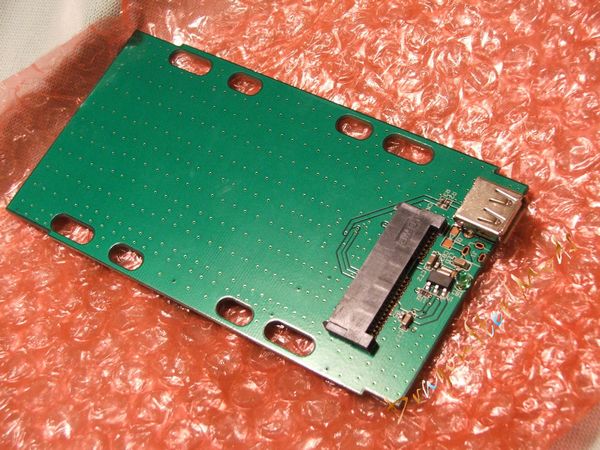
Bgears was nice enough to send me the optional SATA PCB board for the enclosure as well, it was inside of the small white box you saw earlier. 2.5” drives just slide into the connections on the PCB boards and them both slide right into the housing, then you need to secure the end with two small screws, very easy installation.

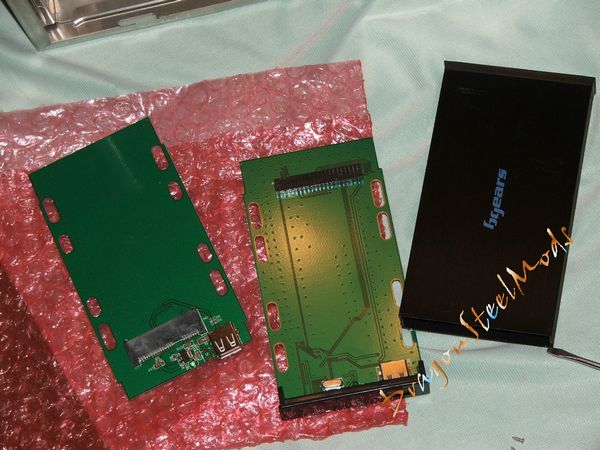
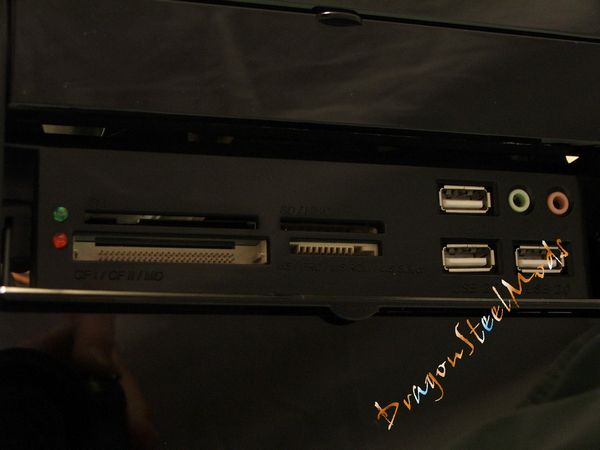
Below the enclosure is the card reader along with three USB ports and audio jacks. The card reader has two LEDs, one to indicate power and the other to indicate data transfer.

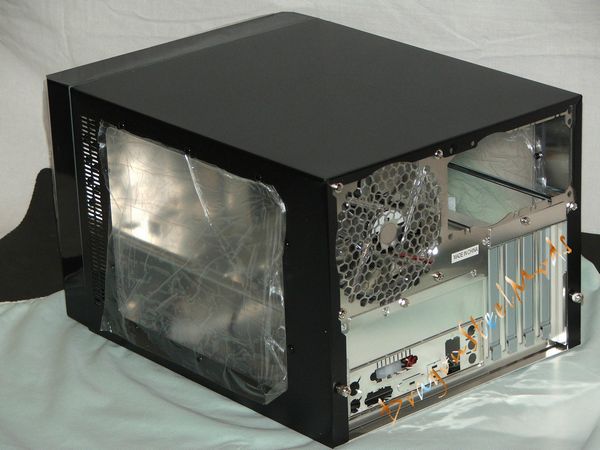
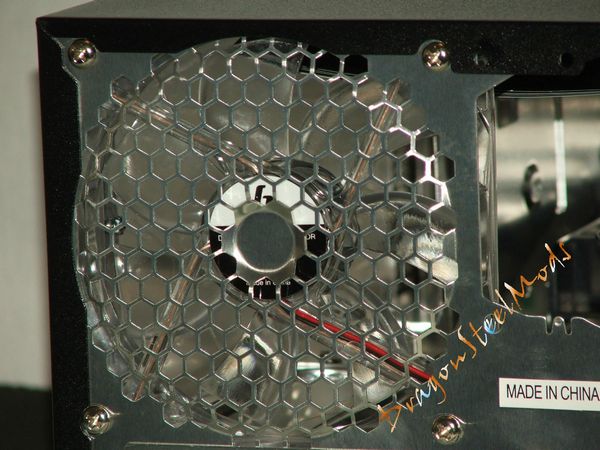
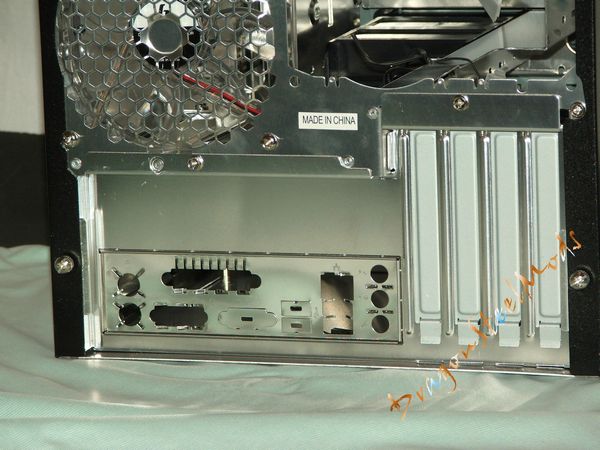
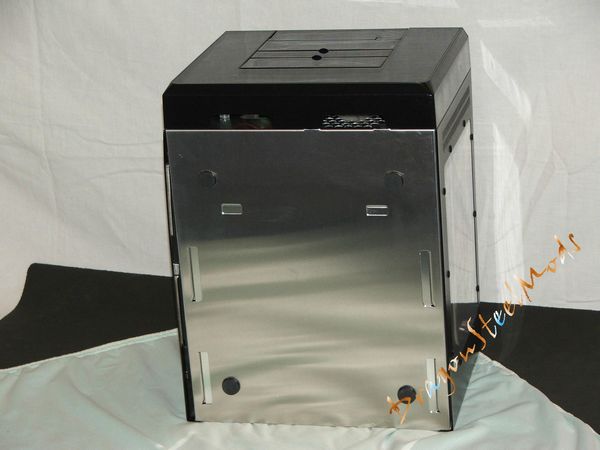
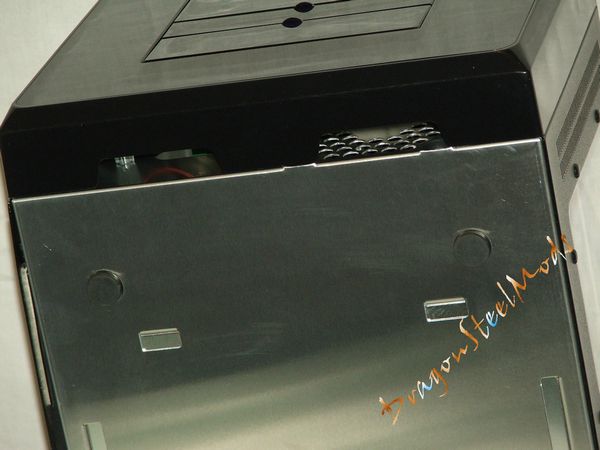
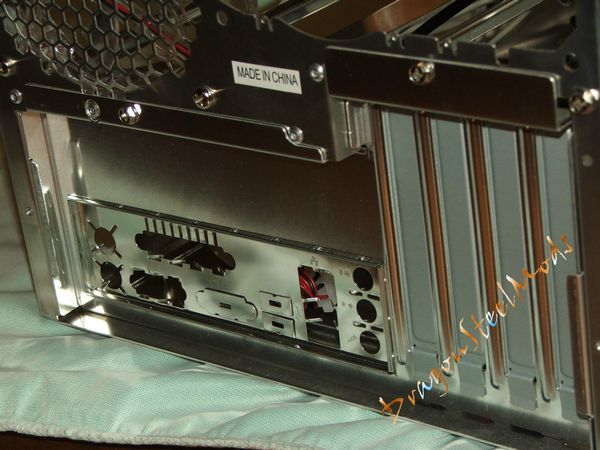
On the back of the case you'll find what you'd find on any other case, just in different places. We've got a 120mm cooling fan, space for the power supply, PCI slots and the I/O plate. The top of the case is held in place by thumbscrews for easy removal.
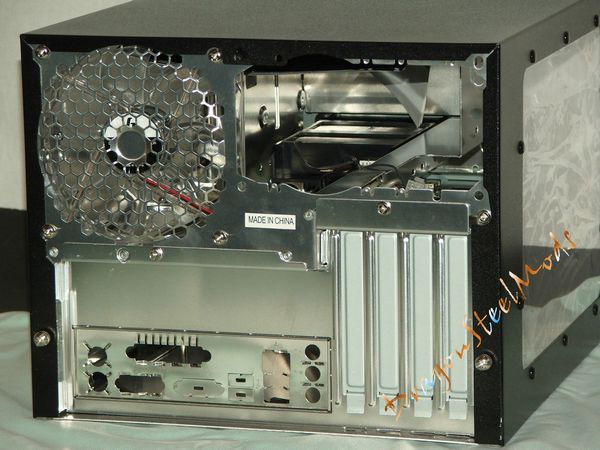
On the bottom of the case we find four rubber non-slip feet. The bottom of the bezel is notched to allow air to come in, and we can see the holes for the optional fan that could be installed inside of the case.
{mospagebreak title=
A Better Look at Things
-Inside}
A Better Look at Things
-Inside:
As I mentioned the top of the case is held by thumbscrews so getting it off is fairly easy, getting it back on though isn't so easy, it's kind of a pain to get it back on the first try.
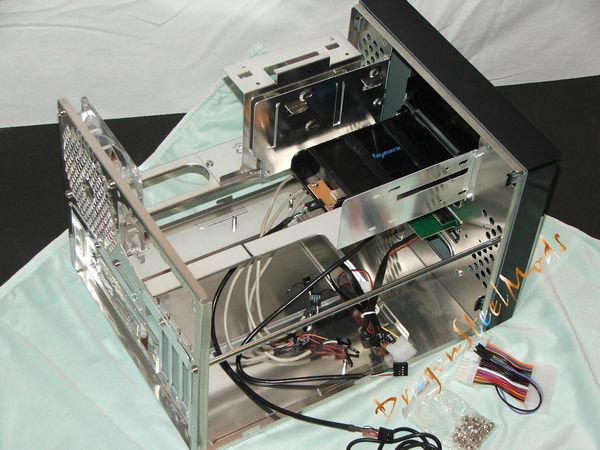
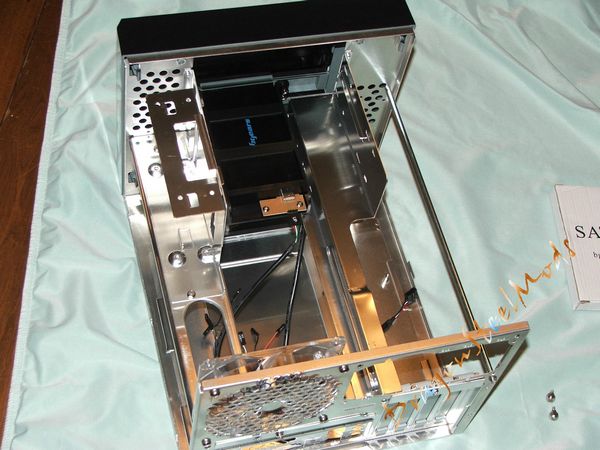
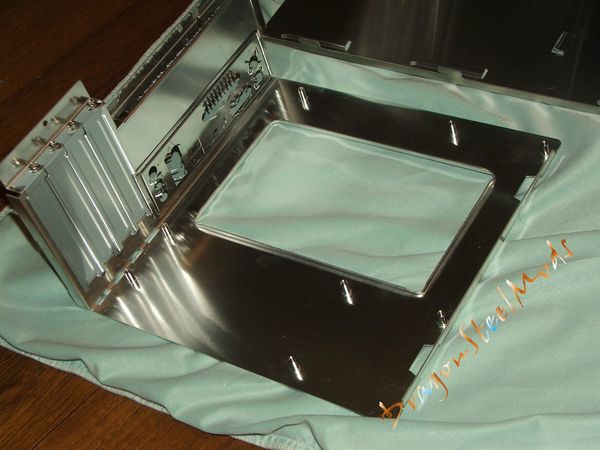
When the b-Envi is empty it looks spacious, the all aluminum case makes it bright and lightweight. There are a couple support bars running across the length of the case to help keep it sturdy.
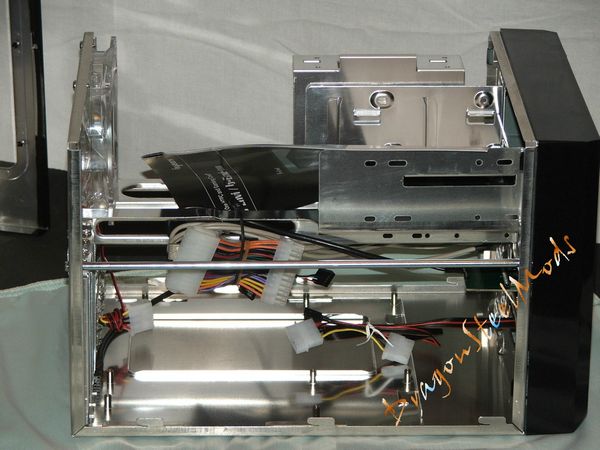
Inside the case we find the familiar accessories, mobo connectors, fan connectors, owners manual and a screw pack. Also included is the USB cable for the portable HDD enclosure and a special adapter for the power cable of your power supply, it has an extra wire coming from it to provide power to the Touch Sensitive Buttons when the system is powered off. Personally I would have went with a standard Molex connection instead of this system.
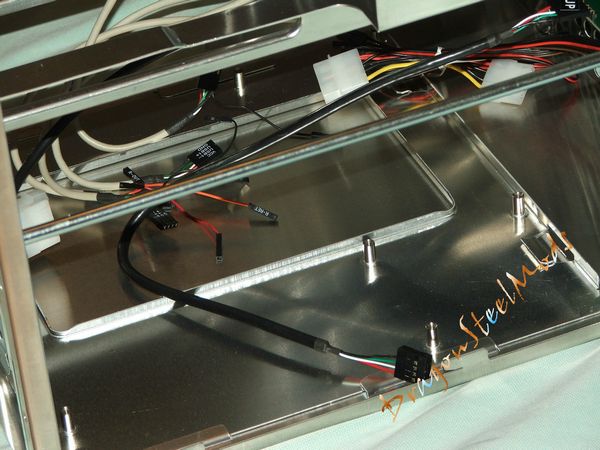
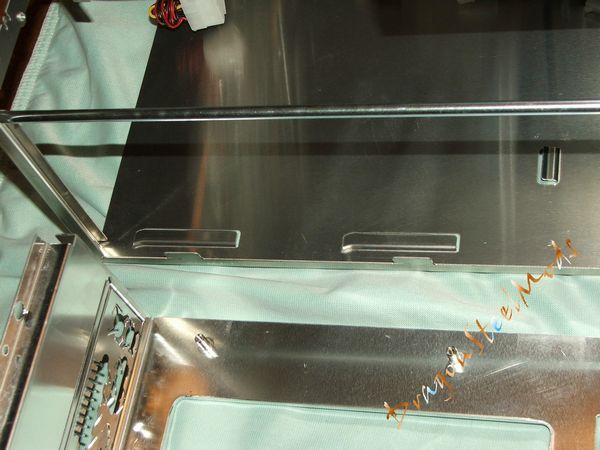
Looking closer inside we can see all the wires from the front are routed though the case, we also see a spot for an additional 80mm fan and we can see the backside of the card reader.
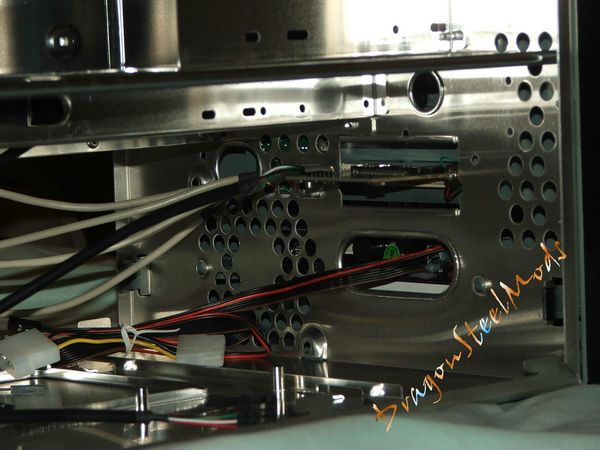
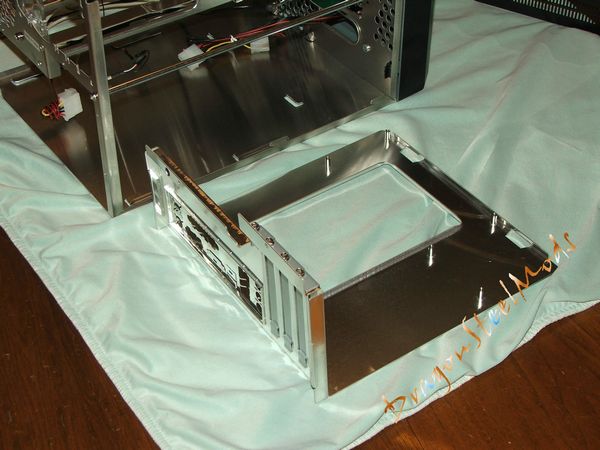
The motherboard tray is removable and held in place with screws on the back of the case and tabs or guides inside the case as well.
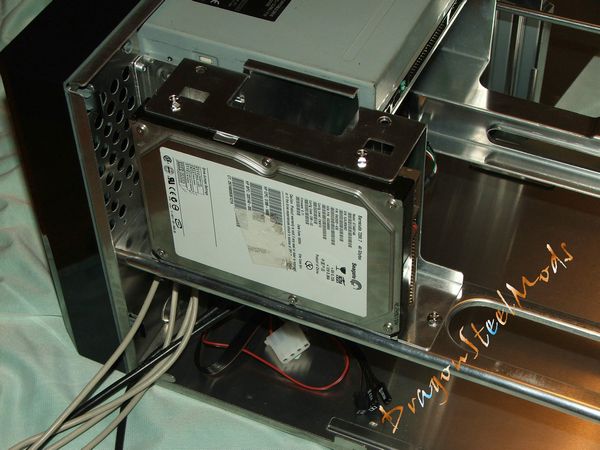
From the top view we can see the HDD enclosure in place before we install the optical drives. The power supply sits on the bar that runs the length of the case for support and stability.
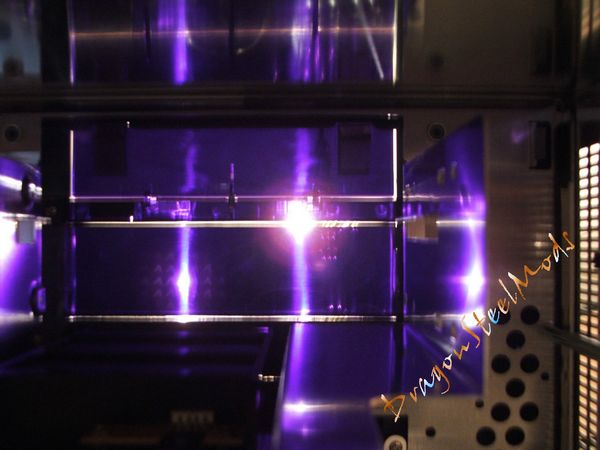
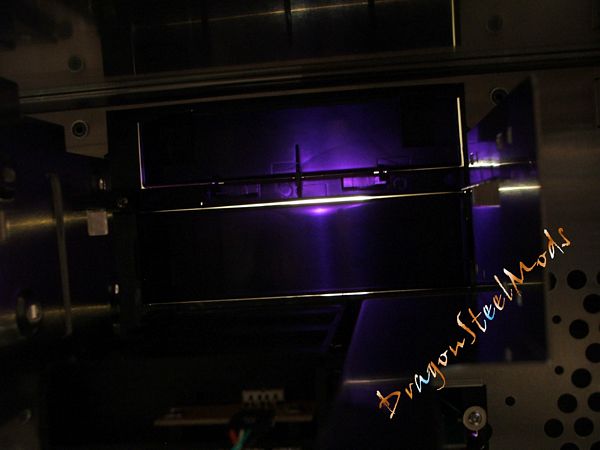
Something I noticed interesting about this case is the color, remember how the case front bezel is black? Well it's not really, it's actually a very dark purple and it's semi-transparent as well. I was checking out the case from all angles, I was actually picking it up and feeling the weight and noticed the light shining through the front from the inside and I saw that it's purple! Interesting, but it does look black from the outside though…

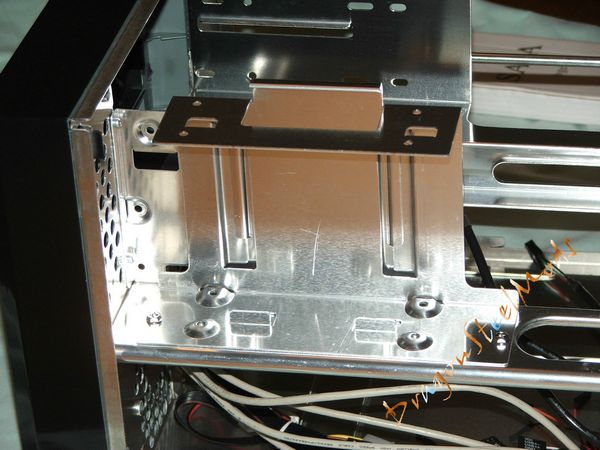
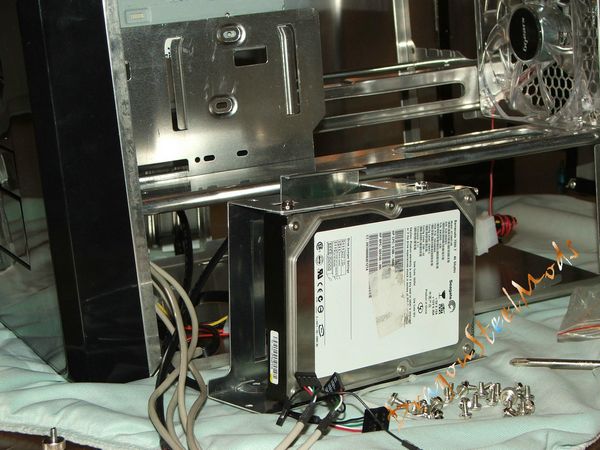
Back to the case here, the HDD cage holds two hard drives and is removable from the case, actually it has to be removed to install the bottom two screws unless you only want to use two screws to hold your drive in place, but that's not advisable…
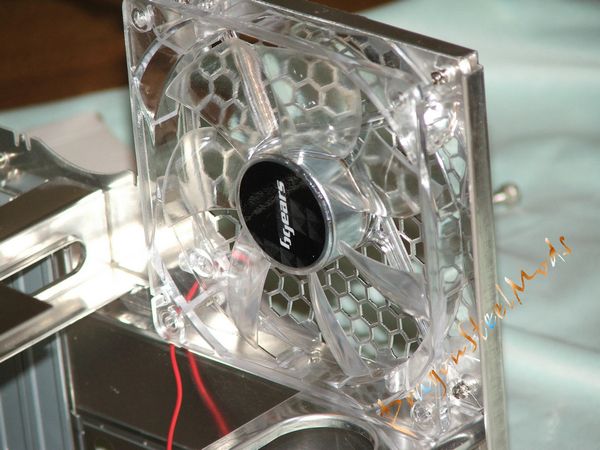
Here's a close-up picture of the 120mm fan that is included with the case, it does have bright blue LEDs in it that we'll see a little later.
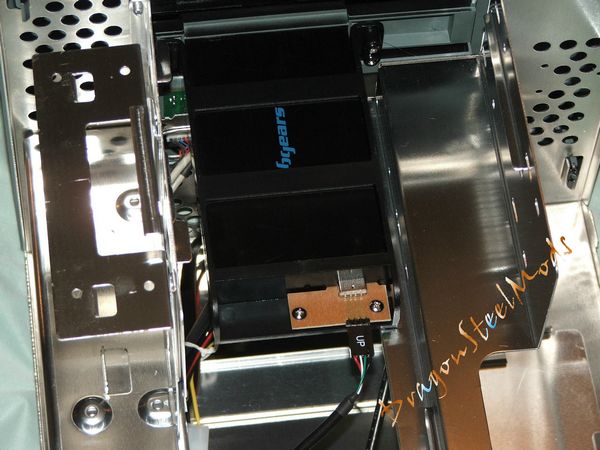
Here's a closer look at the optical bays and the HDD enclosure:
now let's move on to actually getting a system in the case…
{mospagebreak title=Installing a System}
Installing a System:
Since the motherboard tray is removable it only makes sense to take it out as this makes installing the system much easier in this type of case, in a standard sized case with removable mobo tray it's more of a convenience option, I normally don't pull the mobo tray in larger cases even if I can…
After you take the top off of the b-Envi you'll find two screws on the back of the case that need to be removed, one above the PCI slots and one up above over the I/O plate. With this case you pretty much have to take the tray out as when the tray is in place the first PCI slot screw is obscured by the support bar in the case.
Once it's out you can see that the motherboard standoffs are already installed for you, in fact they are permanently attached to the tray. The tray as the rest of the case is shiny aluminum and very lightweight, I found that it bends very easily if you are not careful when handling it.
On the bottom of the case are guides that help you to slide the tray back into the case and they also help secure it as well.
To install your hard drive or drives you'll have to remove the HDD cage from the case or you can't attach the hard drive securely with all the screws, two screws secure it to the frame of the case.
The motherboard I used for this install was a microATX style Gigabyte, you can see that it covers the motherboard tray completely.
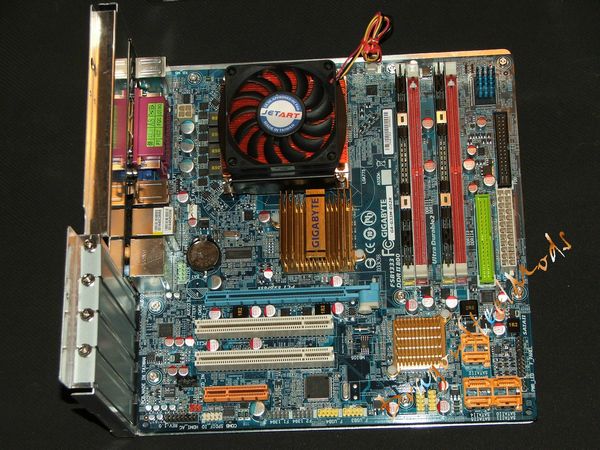
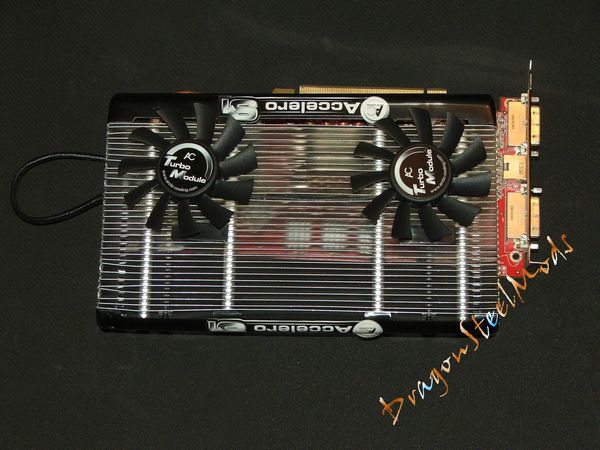
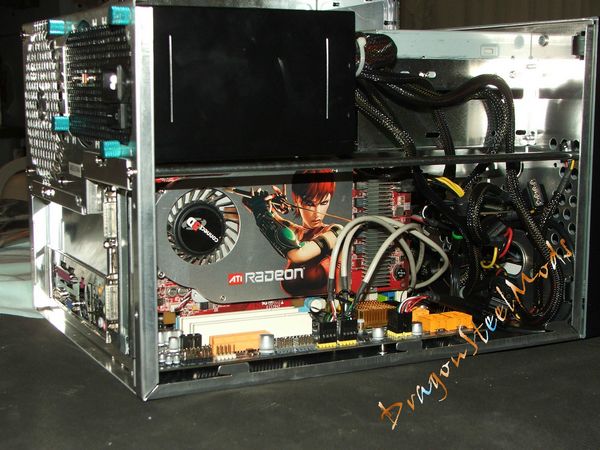
Being this is an SFF case I quickly realized that I needed to remove my after-market Arctic Cooling Accelero VGA cooler from my Connect3d X1800GTO video card, there was no way it was going to fit in there. So I had to add another step to the install process and re-install my stock cooler back on the video card.
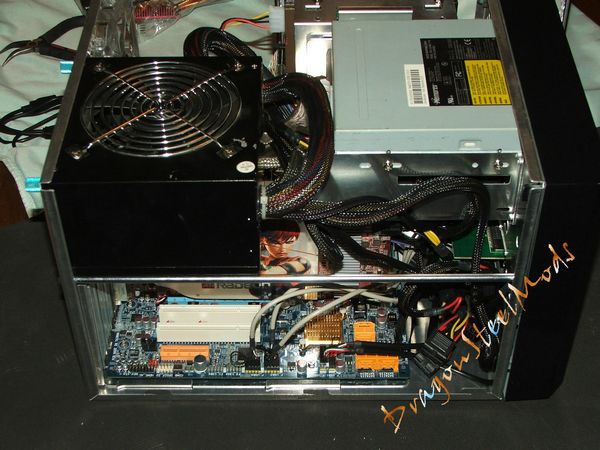
Once you slide the motherboard tray with motherboard back into the b-Envi you'll find that space is at a premium in there, yes there's no video card in this picture, I just wanted to show with just the mobo installed. You'll want to install your video card outside of the case and then slide it all in.
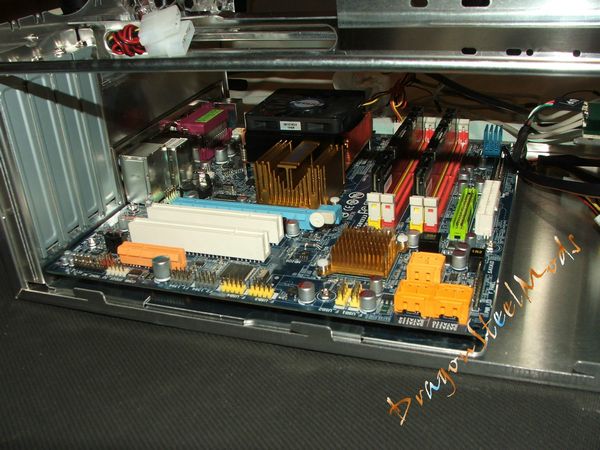
Once you start getting things installed in the b-Envi you'll start to realize that you need to do some wire management to keep good airflow inside the case, even with just one hard drive it's quite cramped with the wiring. From this view you can see there is a pot on the front of the case to install another fan, but it's quite cramped in there so you'd be best to find a thin form factor fan if you'd like to have one there.
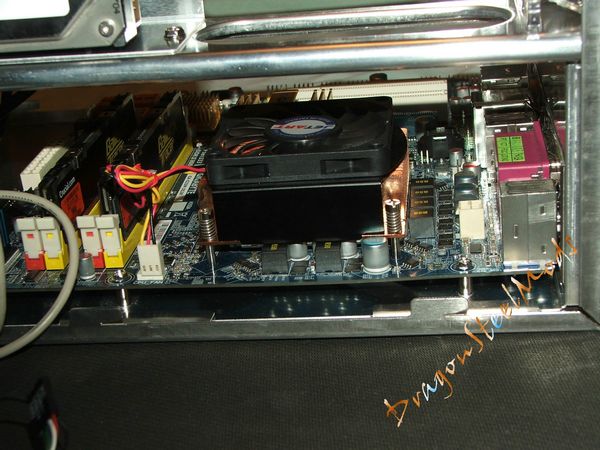
Since this is an SFF case you'll need to use a small CPU cooler, the standard Stock Intel or AMD coolers will fit fine, but who uses stock cooling anymore? So I threw my JetArt SL1800 all-copper CPU cooler in there, nice looking, small, quiet and it does a decent job of cooling the CPU.
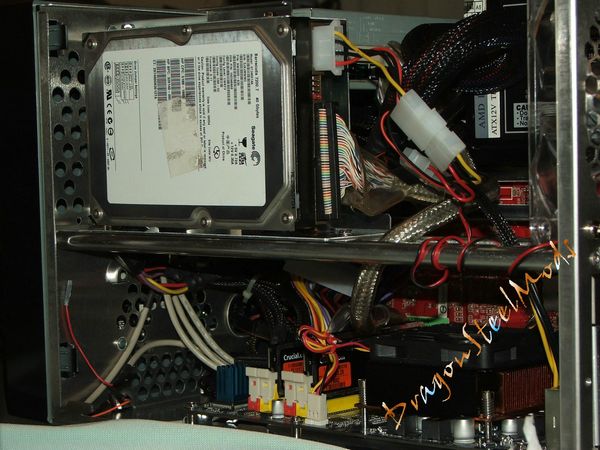
Just like the CPU cooler you'll need to use a standard sized power supply with the b-Envi, large ones will not fit, I had to dig out another PSU just for this review as the Ultra X3 I was using wasn't going to work.
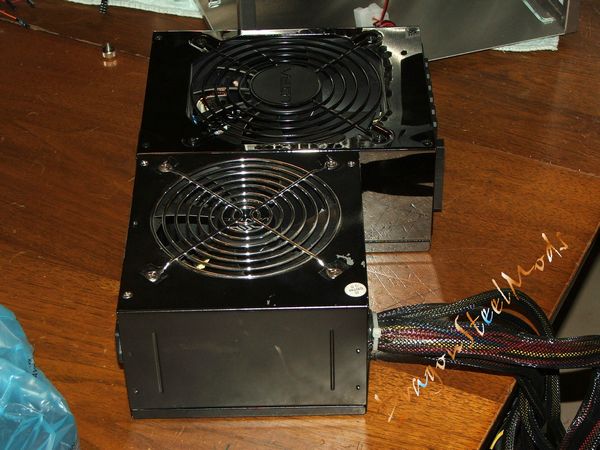
The power supply and optical drive are very close, so it's tight between them to make the connections, and since you really won't be using all of the cabling from the PSU you'll need to find somewhere to stash them out of the way as well. Since the space is limited between the PSU and optical drive you'll have to mount the power supply with fan up as I did, if you mount it with fan down then the cables coming out of the PSU run right into the optical drive and make it impossible to connect the data or power cables. Personally I don't like this setup, my large video card effectively creates a wall between both sides of the case blocking the 120mm fan from effectively cooling that side of the case, if the PSU was mounted with fan down this would not be a problem as the PSU would help to cool that side of the case by drawing the air out. To it's credit though I didn't see much of an increase in the video cards temperatures as opposed to a full-sized case, though I wasn't running the system for hours and hours as you might if you took it to a LAN party where the heat might really build up.
The Connect3d X1800GTO video card I have is fairly large and takes up quite a bit of space inside the b-Envi, it makes things very cramped at the front off the case. I would highly recommend a smaller sized card to be used with this case, but this is common with most cases of this form factor.
{mospagebreak title=Installing a System Continued}
Installing a System Continued:
The Touch Sensitive Buttons are a very cool feature, as long as there is power to the case, the Bgears logo and the power button will be lit up.

When you power the system on the reset button and HDD indicator will light up, the HDD indicator does blink just like any other case.
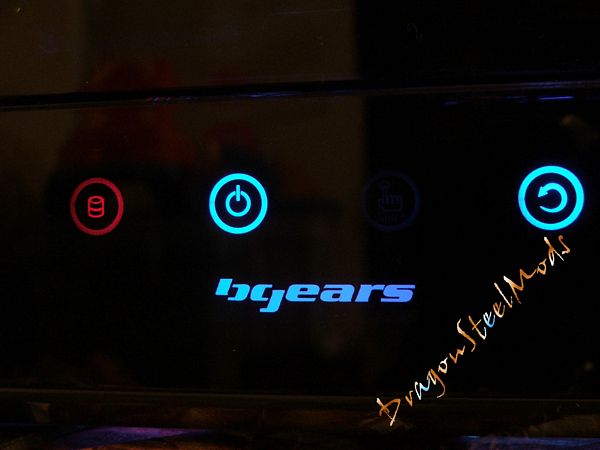
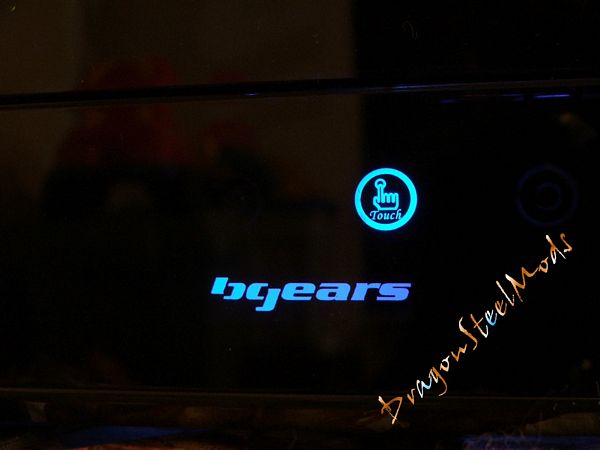
After a few seconds of the case being on, the Touch Sensitive Panel will automatically lock and you'll have to touch the unlock button to be able to access the power and reset again.
While the touch sensitive buttons are really cool the annoyingly loud beep that follows each press is not, every time you touch a button the case lets out of very loud shrill beep, and also when it automatically locks. I'm not kidding when I say it's loud either, my wife told me she could hear the beep upstairs and was wondering what I was doing down here… I would advise ripping the integrated speaker off of the PCB, yes it's that annoying,(well maybe not that drastic but figure out some way to muffle the sound).
The included 120MM fan had very bright blue LEDs in it, it effectively lights up that side of the case, the other colors you see are the two sticks of Crucial Ballistix Tracer Ram I have in there.
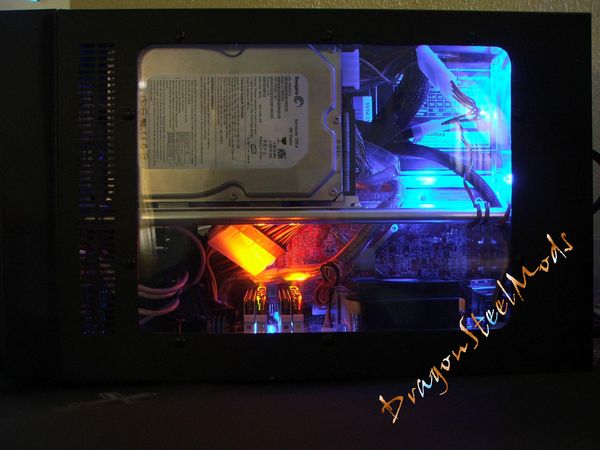
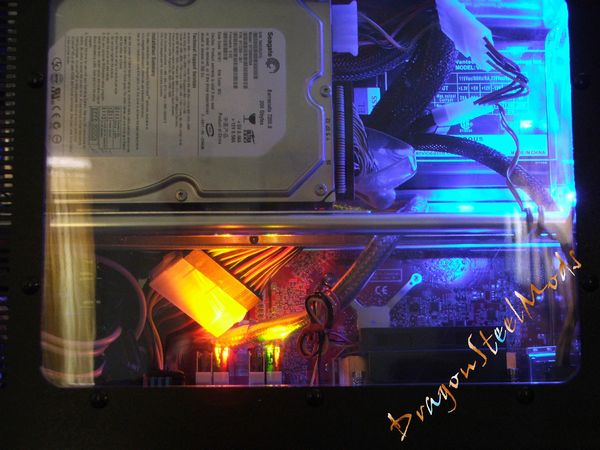
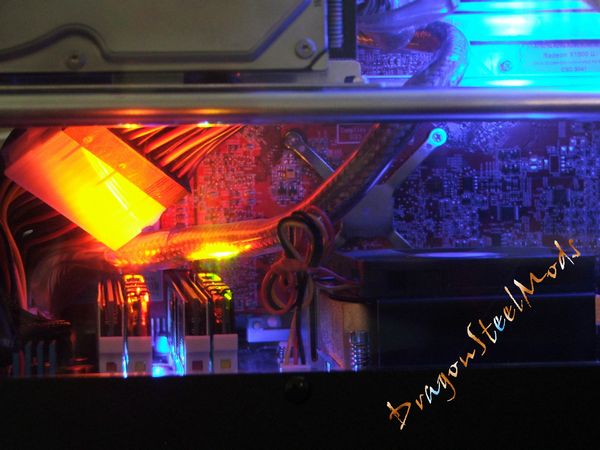
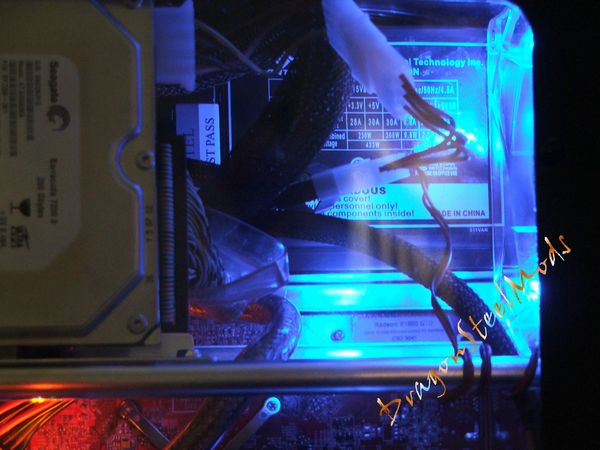
The opposite side the case is pretty much dark, the PSU and video card block most the light coming though. Maybe having a PSU with LEDs in it would be the way to go here for a better presentation, but it's not big deal unless you personally think it is.
The space issue related things I've mentioned in this review are mostly not specifically picking on this case, but it goes for any SFF cases, space is very limited inside of them all.
Now, here are some things that I found are specific to the b-Envi case:
There's no fan guard on the fan, this bugs me and always has with any case, but especially for a case of this size where wires can very easily get caught in the fan.
I mentioned the beep with the touch panel already but it's just so damn annoying that I felt it needed mentioning again.
Bgears was nice enough to include the SATA PCB for the 2.5” enclosure but it doesn't fit in the enclosure, when installed the USB port sticks out too far and does not allow it to mate with the connection inside of the case. I spoke with tech support and they understand the issue and sort of have a work-around but are getting new PCB boards to solve the issue completely.
The IDE PCB board worked fine and I do really like the idea of having the portable enclosure there, you can use that spare HDD for more storage or even another operating system if your motherboard supports booting from USB.
The last small problem or large possibly if you aren't paying attention, is that when I was removing the screws from the case and putting them back in I noticed quite a bit of metal shavings falling from the case onto the case bottom and then onto my motherboard when it was in the case. I read a couple other reviews of the b-Envi and no one else mentioned that so either they weren't paying attention or it was just specific to the case I got for review. Normally some metal shavings are expected and seen with a brand new case, and 'almost' every new case will do that, but there was a lot of shavings that I saw, so much so that I pulled the motherboard back out and blew the entire case and mobo down with compressed air to clean it up to prevent any possibly problems.
The b-Envi actually does a nice job of keeping things cool, there was only a couple degree difference between the b-Envi and the Thermaltake Matrix VX that I had my system in before this review. I was actually surprised at the temperatures I got with the b-Envi, I did expect them to be quite a bit higher than an ATX case but apparently the design and all aluminum construction work well at keeping things cool.
Summary:
Overall the b-Envi is a very nice case, it's well designed, lightweight and makes a very nice presentation.
The b-Envi also keeps your system cool, the touch sensitive buttons are a very nice attractive feature, as is the card reader and included removable hard drive enclosure.
There are a couple minor flaws with the b-Envi which can be overlooked but the problem with the metal shavings is rather serious and is something that can destroy a system, as I said though no one else mentioned the shavings so it might be the one I got for review.
DragonSteelMods gives the Bgears b-Envi SFF Case a 4 out of 5 score.

Pros:
-Touchpad, no buttons
-Sleek look
-Lightweight, aluminum
-Keeps system cool
-Easy to assemble
-Included portable storage
-Removable motherboard tray
-Solid, well-made
-Included card reader
Cons:
-Loud annoying beep indicator
-Metal shavings from screws/case
-Problems with SATA PCB board compatibility
-No fan guard
I would like to thank Bgears for the chance to review the b-Envi and for their continued support of DSM.
review# 384