In the last few years, micro controllers have come a long way. Micro controllers that are now much easier to program are available and for a low price too. This means that anyone with the right skills as a basic level, is able to develop programs to play around with the microcontrollers to achieve whatever task they have in mind. For persons starting to experiment with microcontrollers, progressive automations websites can come in handy to learn the basic skills.
The advent of the open software has also pushed the development to much higher level at a very fast rate. This has thus been the main reason of the fast growth in the microcontrollers’ realm. Using the arduino micro-computer, it is possible to move, pivot, lift, pull and push items in the manner one wants in a variety of ways. This is made possible by combining the flexibility of the arduino programming and linear actuators to develop the setup of choice. Linear actuators are basically devices that turn rotational movement into linear motion. Most importantly, they tend to have very levels of precision compared to other types of actuators. Combined with an arduino, one can come up with a precise setup to deliver remarkable results.
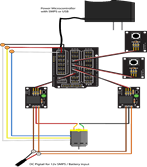
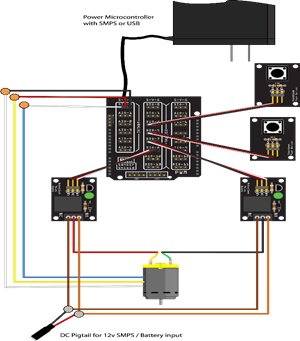
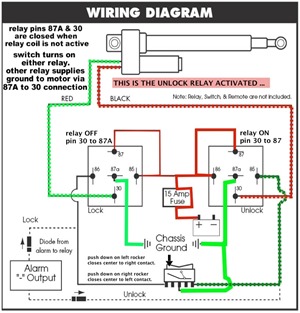
As a traditional concept, the linear actuators have five wires, two of which go to the motor while the other three go to the internal potentiometer for positional determination. To get the motor running, it is important to note that, there has to be some form switching mechanism that will be used to control the high current load of the linear actuator. The relays help with toggling the positive and negative power running through the motor, therefore determining the direction that the piston travels. There are two ways that this can be done using arduino; one where a relay board is used for controlling power that is going to the actuator but without position information, secondly one can use the actuators that have FA-PO feedback which will help with establishing the position of the shaft and possible to create a closed loop for control. To make sure that the actuators actually work, there is need for the setup to include two Single Pole Double Throw relays, which have three connections for each of the relay; normally open, normally closed and common. With the two relays, it is possible to start and stop the actuator. The two relays also make sure that, when neither is triggered, they offer a breaking function, such that, the actuator stops immediately rather than drifting to a stop.
According to www.progressiveautomations.com different linear actuators have different specification, as such, there need for the user to write the code that best commands the actuator to move in a certain direction, degree or even with certain speed. The arduino offers easy coding terminals to help with the scripting. Different codes can be written to establish the motion that is desired by the user and the ability of the actuator in question, along with the function to be performed. When writing the code, for linear actuator, it is recommended that milliseconds command; servo.writeMicroseconds() are used instead of the degrees for precision. It is also possible to write a code that is going to determine the position of the piston between 0 and 100 in percentage and even in terms of the length of the piston. In the code SetStrokeMM(30,100); the piston rises through 30mm of its 100mm length. When using the percentages, one can program the stroke between 0-99%, where the code relates to SetStrokePerc(). However, it always important to be cautious as not to strain the motor by coding for 100% movements, as this is a limit that can cause damage in the long run.
Picture Credits:
1.http://learn.robotgeek.com/images/tutorials/largeLinearActuator/relayLinear.png
2.
http://s1207.photobucket.com/user/waynep712/media/actuatorrelayunlockcolorized_zps6d4201cb.jpg.html


