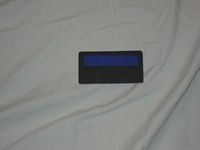
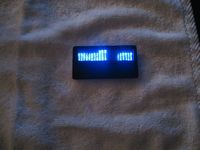
How many of us wouldnt want to see our names up in bright lights? Well thanks to the folks at USB Geek, those dreams can come true. Today, I will be looking at the Scrolling LED Name Badge from USBGeek.com.
Scrolling LED Name Badge from USBGeek
Reviewed by: Tomas Ratas
Edited by: Kristofer Brozio
Sponsor: USBGeek
Tech Specs,Features or the Basic Info:
Scrolling LED Name Badge from USBGeek
Features:
-8 message storage capacity, six Scrolling modes.
-Each message 255 characters long.
-Onboard speed and brightness adjustment (8 speed and 3 brightness settings)
-Scrolling modes: Right-Left, Left-Right, Down-Up, Up-Down, Freeze, Flash, Loop.
-All functions can be programmed without a computer.
-Message text can be easily programmed using the onboard programming buttons
-Dimensions: 4.2 x 7.9cm
-Weight: 32gm
Package Contents:
-Scrolling LED Name Badge
-Magnetic holder
-2 x CR2016 batteries
-User Manual
{mospagebreak title= A Better Look At Things}
A Better Look at Things
:
–
–
–
–
–
–
–
–
–
–
The LED Badge comes in a clear plastic ziplock style case. Contents include: the badge, two CR2016 batteries, a user manual, a driver and software installation CD and a USB programming cable.
The badge is available with either red or blue led lights. There is a matte black plastic border surrounding the badge.
The back of the badge is a naked circuit board with a battery holder, an on/off button, up/menu and down buttons and a magnetic strip for attaching the badge to metal surfaces.
The infrared receiver is located next to the down button.
The instructions are printed a single piece of paper and are written in poorly worded English, not unlike most of my reviews. I am kidding, I think.
There are six different scrolling modes ranging from freeze, to flash, to left to right and vice versa and up and down and vice versa. The brightness of the badge can be adjusted in 25% increments to 100%. There are four different scrolling speeds and eight different message slots.
Installation, Testing and Comparison
Installation involved some trial and error. Since there was no information about installing the USB programming cable and the drivers, I hunted through the CD for any insight into the installation process.
There are two directories on the CD, the USB Driver and the Badge Software folders. Under the USB Driver folder, there are folders for Windows, Linux and Mac drivers. However, there is also a windows pre-install folder, which I ran first, and then I ran the cp210x_Drivers.exe. Once these two files were installed, I then plugged in the programming cable into the USB port. Windows then detected the drivers without any problem. Success. Did I mention that the documentation leaves a lot to be desired.
Installing the badge software was easy, but the first screen after starting the process has Japanese fonts, which was worrisome because I do not speak Japanese. However, everything else was installed in English and the software ran perfectly after that point.
Running the badge, involves installing the two CR2032 batteries and pressing the on button. There are three brightness settings, which are controlled by the number of presses of the on button which also acts as the enter button. The badge starts off on the brightest setting and gets dimmer with each subsequent press, the fourth press shuts the badge off.
Sending messages to the badge involves typing in some text in the badge software and then using the USB Infrared Programmer to beam the message to the badge. You can set the speed, the scrolling mode and whether the scroll flashes off the software or on the badge itself.
Switching messages on the badge is performed by hitting the up button and then hitting power for the screen number to show up, then using the up/down buttons to select the message number you wish to display. There are eight message slots that each holds up to 255 characters.
The one thing that this badge does not do is shut off by itself. This could be a costly proposition, as I found out the hard way that my Radio Shack charges seven dollars for a single CR2016 battery.
Summary:
Most people would view the LED Badge from USB Geek as a novelty item. The badge could be used a sign in a small business window for sale announcements, store hours, etc. For personal use it seems more like a fleeting novelty. The major drawback is the lack of a timer or auto off switch to preserve battery life. Overall, the LED Badge provides a nice bright LED screen with quite a few options in a small package. How you put it to use will vary on personal choice.
DragonSteelMods gives the Scrolling LED Name Badge from USBGeek a 3.5 out of 5 score.

{mosgoogle right}
Pros:
-Bright Screen
-Magnetic Holder
-Can display long messages.
Cons:
-No auto off switch
-Poorly written instructions.
I would like to thank USBGeek for the chance to review the Scrolling LED Name Badge and for their continued support of DSM.


