

So… We’ve hit 500 reviews here at
DragonSteelMods, that has to be some sort of milestone doesn’t it? It
doesn’t feel like we’ve done that many though, time just flies by
when you’re having fun eh?
Today for review I’ve got the
Thermaltake Xaser VI MX PC Case and it’s got quite a few features
that most anyone would appreciate in a PC case. The Xaser looks great
with it’s red and black color scheme and side window, inside you’ll
find tool-less drive bays for both 5.25” devices and your hard
drives making installing your system very easy.
So continue on to learn more about the
Xaser VI MX case…
Thermaltake
Xaser VI MX PC Case Review
Author: Kristofer
Brozio
Sponsor:
Thermaltake
Tech
Specs,Features or the Basic Info:
VH9000BWS
Features:
-Optimized design for both
liquid cooling and air cooling system
-Tool-free design for 5.25”
device and PCI slot
-Independent thermal management
for CPU, VGA & HDD
-Cable management system for
better cable routing and internal air flow
-Micro ATX, ATX supported
Specs:
Case Type Mid Tower
Material 0.8 mm SECC
Front Bezel Material
Plastic
Color Black
Side Panel Transparent
Window
Motherboard Support 12″
x 9.6″ (ATX),
9.6″ x 9.6″ (Micro
ATX)
Motherboard Tray N/A
5.25″ Drive Bay 5
Ext. 3.5″ Drive Bay 1
Int. 3.5″ Drive Bay 4
Expansion Slots 7
Front I/O Ports
USB 2.0 x 2,
eSATA x 1,
HD Audio
Cooling System
– Front (intake) :120 x 120 x
25 mm Turbo Fan fan, 1300 rpm, 17 dBA
– Rear (exhaust) :120 x 120 x
25 mm Blue LED, 1300 rpm, 17 dBA
Liquid Cooling Capable Yes
Liquid Cooling Embedded No
Power Supply Supported
Standard ATX PS2
Power Supply Included No
Dimension (H*W*D) 20.74 x
8.66 x 20.74 in 520 x 220 x 520 mm
Net Weight 18.40 lb 8.35 kg
Security Lock
Warranty 3 Years
{mospagebreak title=
A Better Look at Things
– Outside}
A
Better Look at Things -Outside:
The Thermaltake Xaser VI MX case
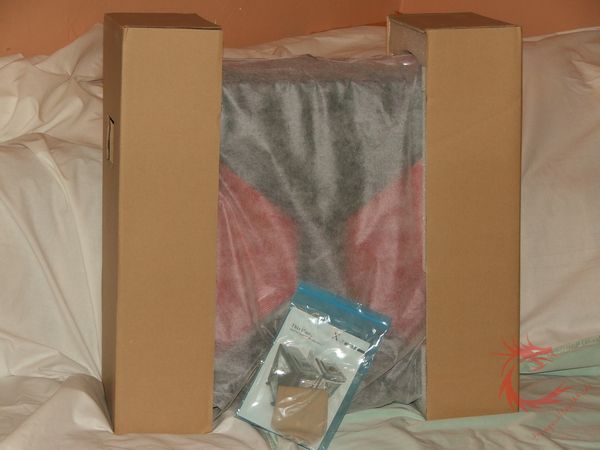
come sin a nice flashy box as is the style of Thermaltake. You’ve got
several pictures and information all of the box about the case. The
case is packaged very well inside to protect it during transport.
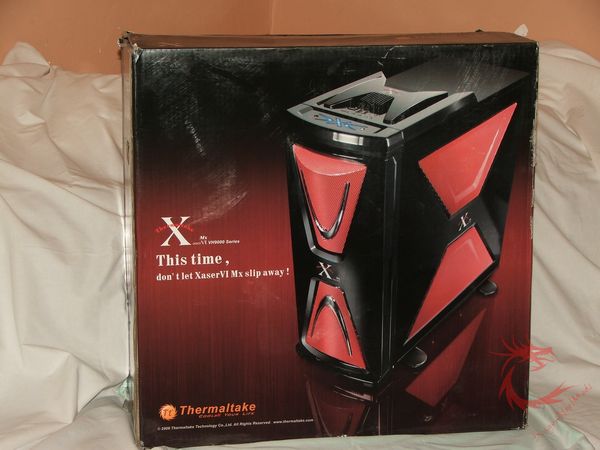
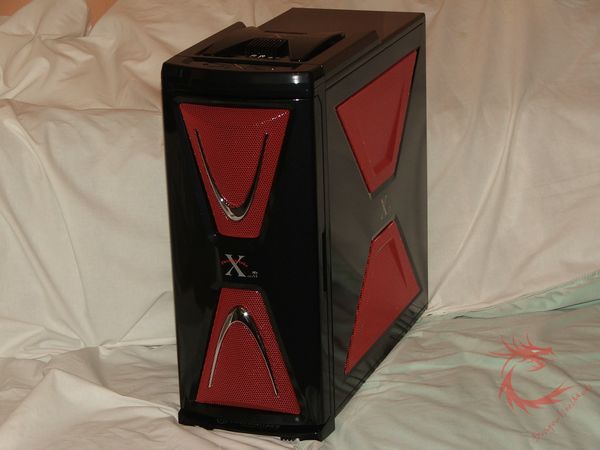
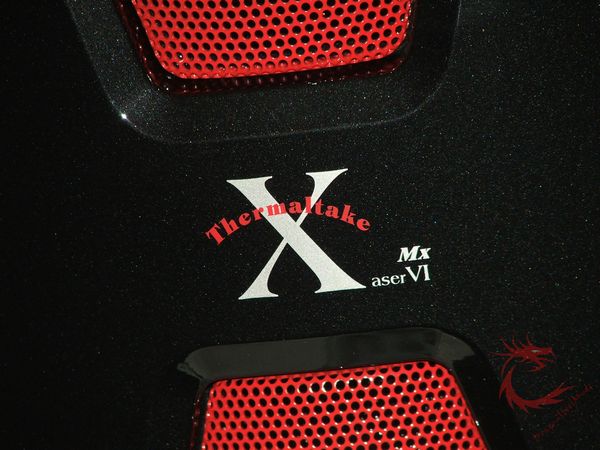
The Xaser is a red and black
themed case that I think most will like, it looks nice and isn’t
overly flashy. The right side panel of the case is screen is allow
airflow into the case to help keep things cool.

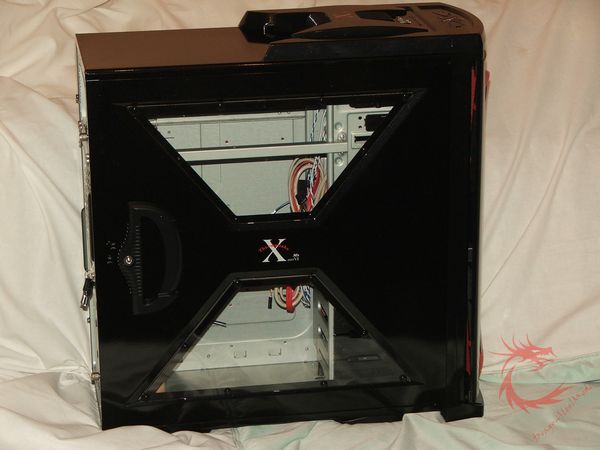
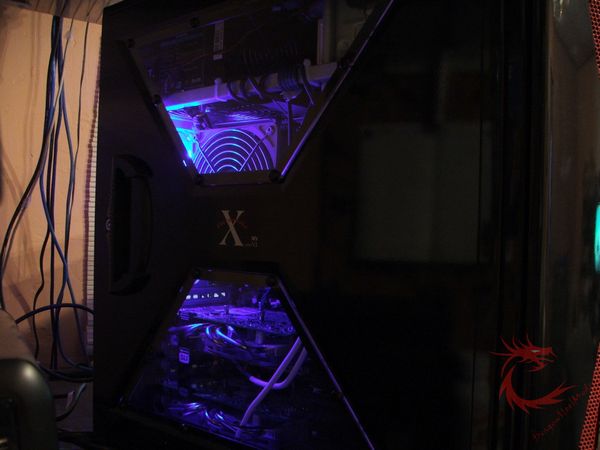
There is a window on the left side
panel, the panel also locks for security if you wish.
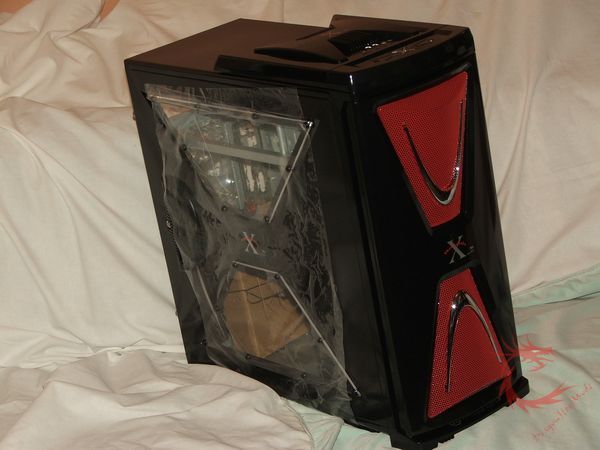
Th case does have a door on it
obviously that opens to the left side, the door can be removed if
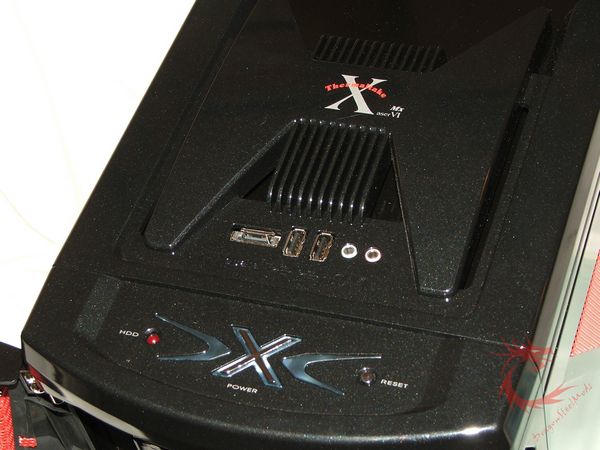
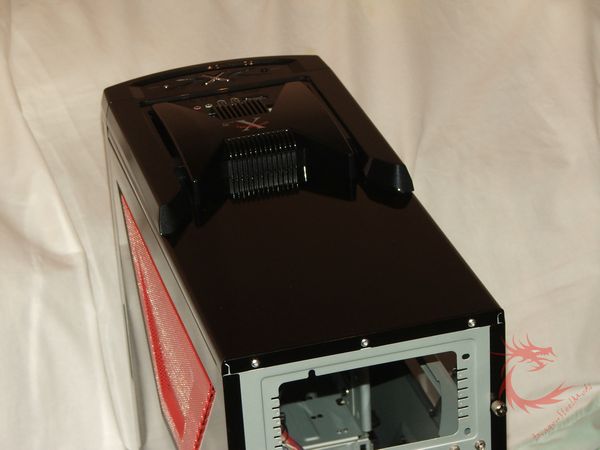
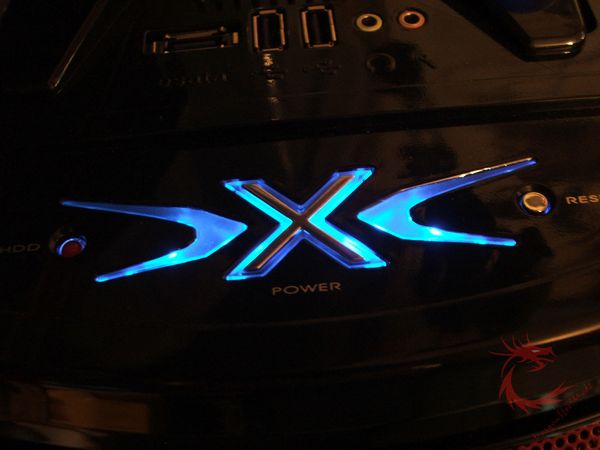
need be, but it’s not reversible. The top of the case is where you’ll
find your input out connections, along with a large ‘X’ shaped power
button that lights up when the system is powered on.
Here’s shot of the left side after
the protective plastic was removed from the window:
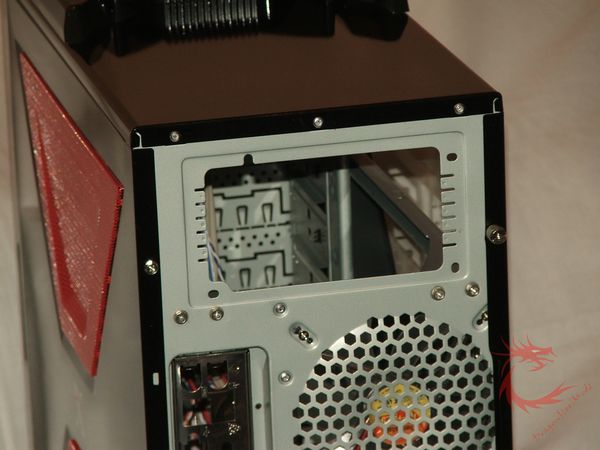
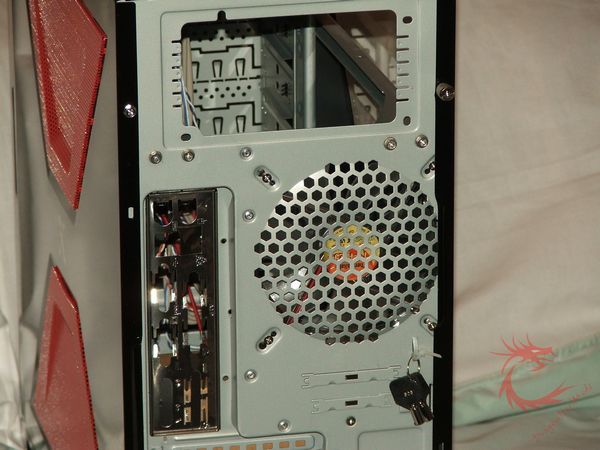
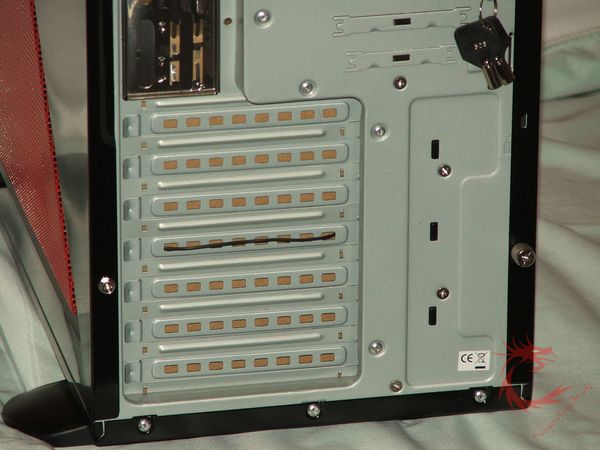
The back of the case is the same
configuration as other cases, PSU on top, I/O plate, and fan in
middle and the PCI slots on the bottom.

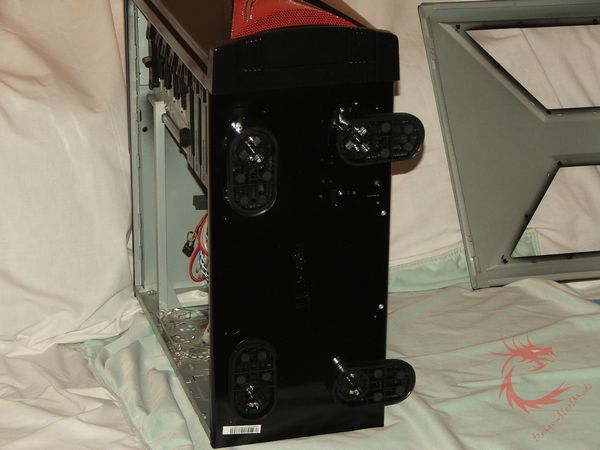
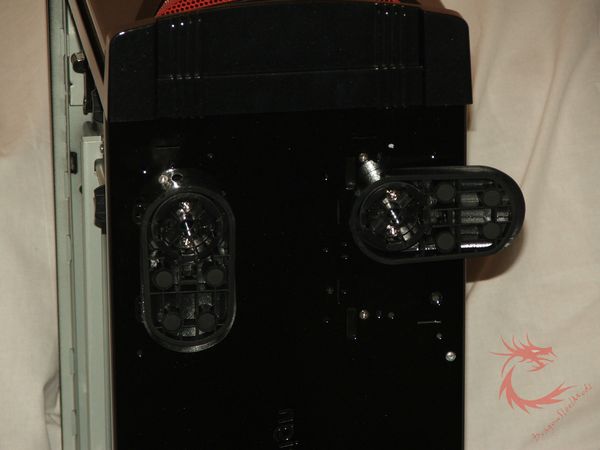
The bottom of the case has large
fit to keep the case stable, the feet can be rotated to the sides to
allow for even greater stability.
{mospagebreak title=
A Better Look at Things
– Inside}
A
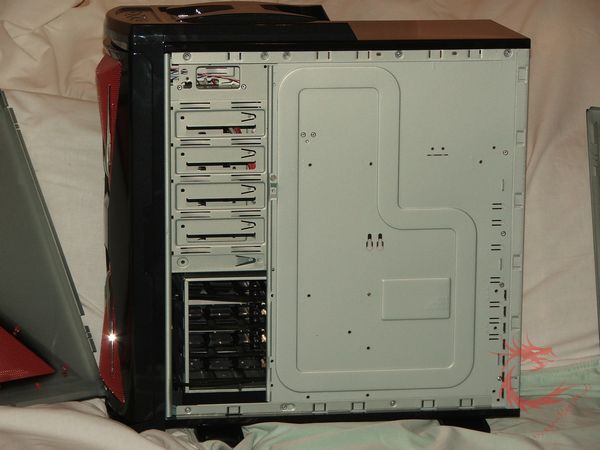
Better Look at Things -Inside:
The left side panel does feature a
nice handle to help remove it, that’s also where you’ll find the
lock.

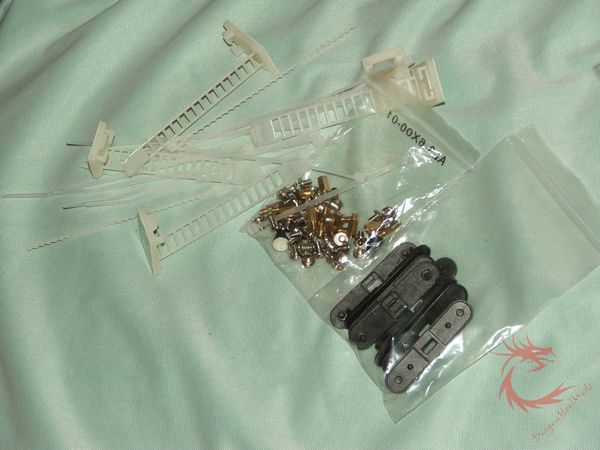
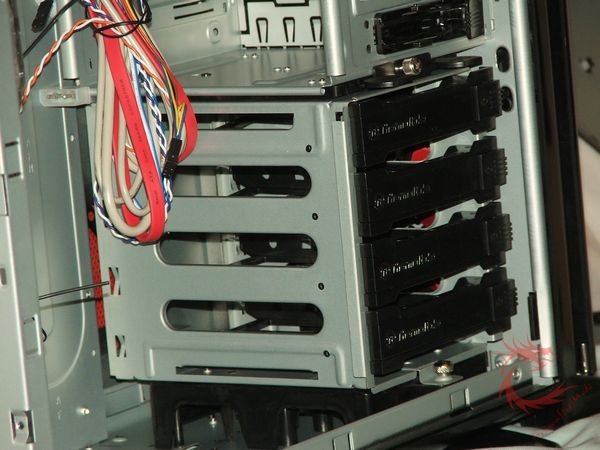
Once the side is off we find a
small box with accessories in it, the standard stuff, screws and
motherboard stand-offs, but also Thermaltake included several types
of cable management ties, ans the special clips used to mount the
hard drives in the cage.
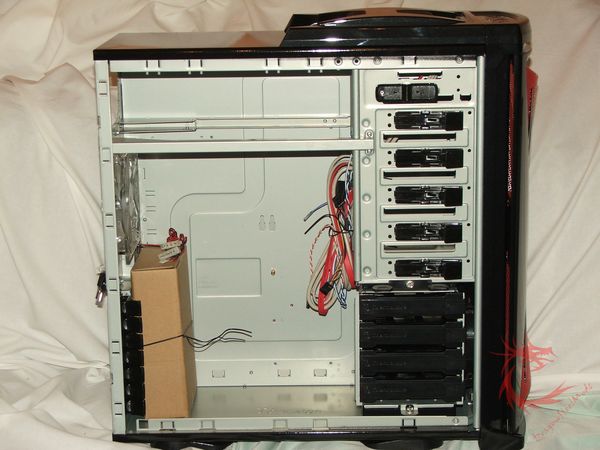
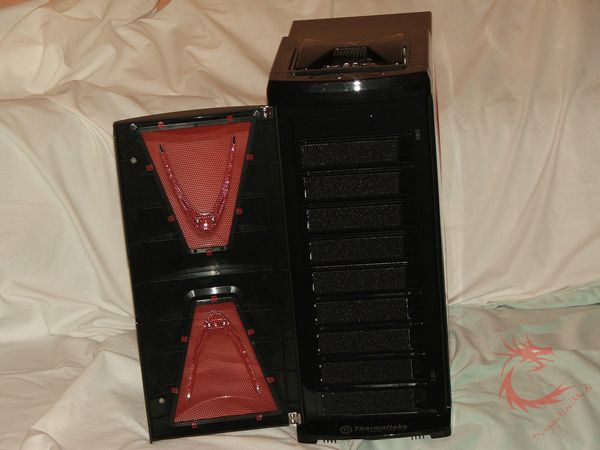
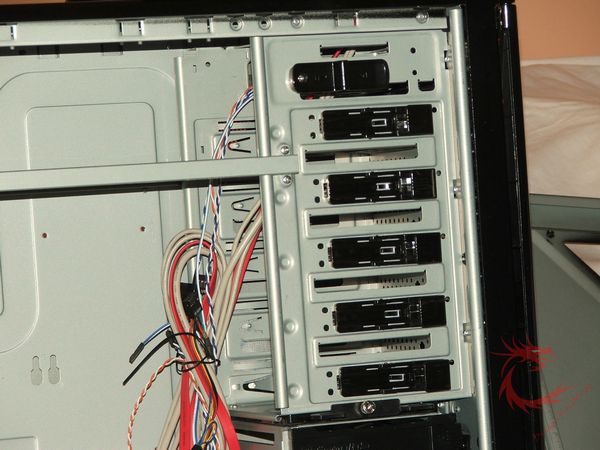
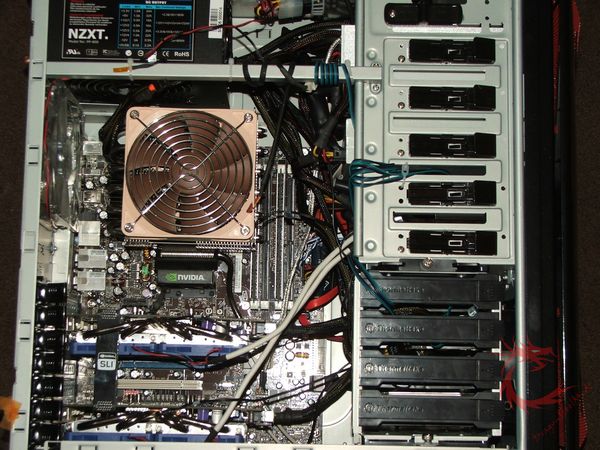
The 5.25” bays are mostly
tool-less and they seem to work well, there are holes for screws as
well if you wish the added security of them. Under all of the 5.25”
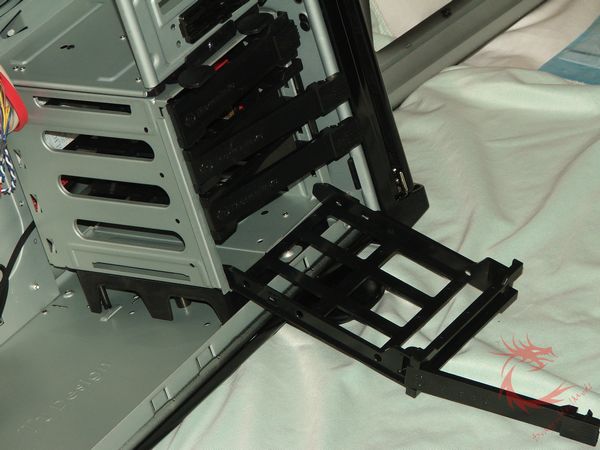
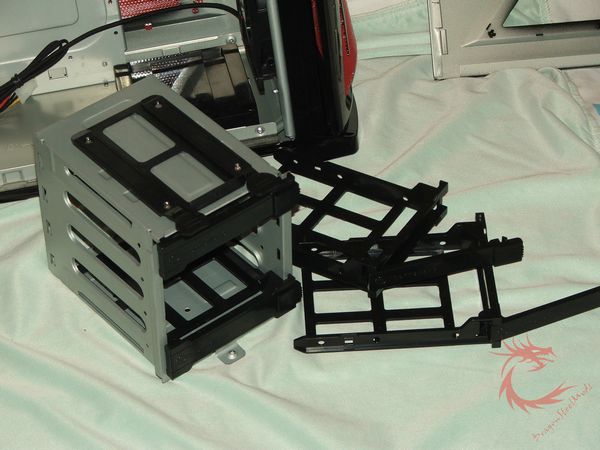
bays is the hard drive cage that is removable with removable HDD
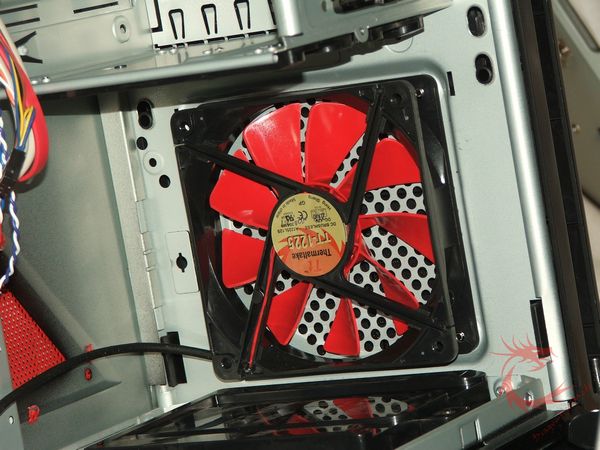
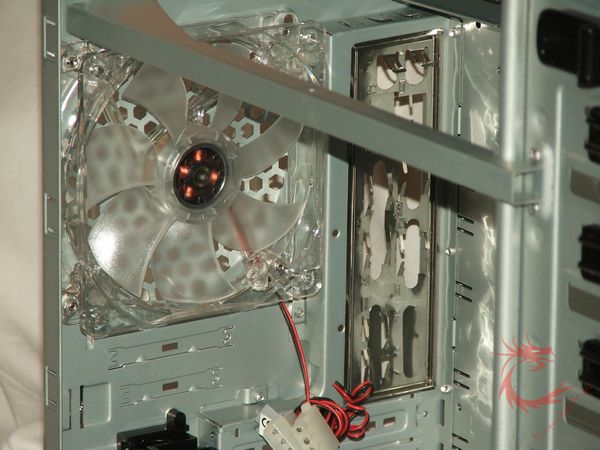
trays as well, behind or in front of the cage is the 120mm intake
fan.

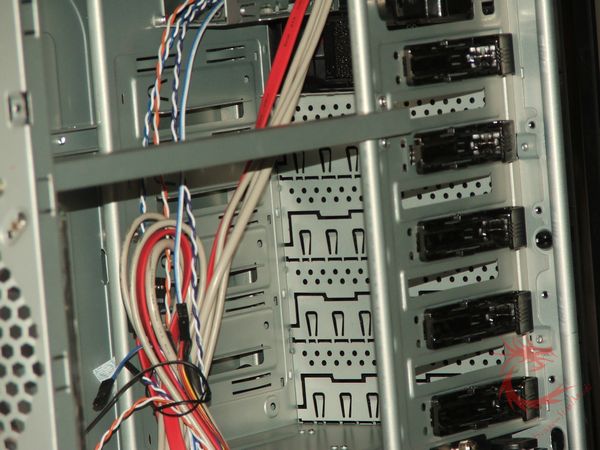
The back of inside if the case
features a 120mm exhaust fan with blue LEDS in it, and a tool-less
PCI lock system.

Removing the right panel we can
see there’s quite a bit of room for cable management back there, you
can easily hide your wires if need be as the side panel extends out a
bit to allow room for the cables.
{mospagebreak title=Installation}
Installation:
Installing our system in the Xaser
VI MX case is easy, there’ a lot of room to work and the HDD bay is
removable as I showed you previously.

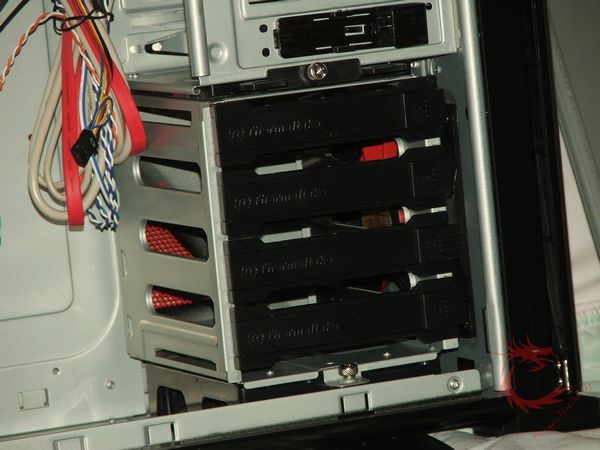
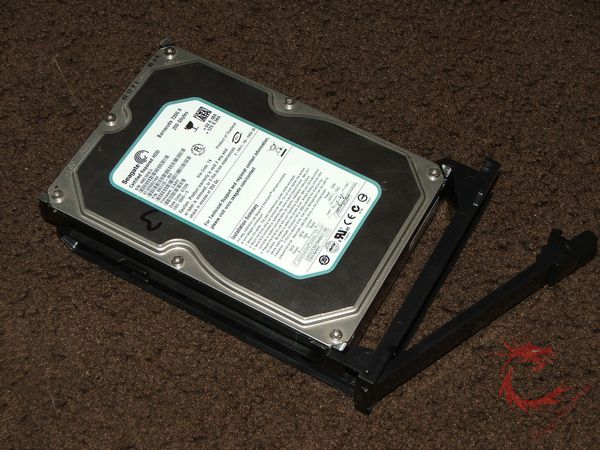
To install your hard drives you
just need to put them in the included trays and use the plastic locks
that are included, then just slide them back into the rack. I like
the idea that the HDD connections are on the back of the case, it
helps with cable management quite a bit.

I’ve installed my main system in
the Xaser, and found no clearance issues at all, event he largest
video cards should fit, but it might be tight depending on the size
of the card because of the HDD cage.
The 120mm exhaust fan does have
blue LEDs in it, it makes for a nice look when the lights are low,
but I would have liked to see red LEDs in the fan to go better with
the color scheme, but that’s just my preference.
The top power button lights up, it
looks like the Xaser logo when powered on.
On the front there are five usable
drive bays, the bottom four are the vents for the120mm intake fan
inside. The intake fan is very loud honestly, at least to me it is ,
but I like my system to be as quiet as possible, so I ended up
swapping the front fan out for a Noctua 120mm fan to make things a
bit more quiet.

Getting everything installed is
easy I ran across no clearance problems with my system, I did have to
remove the metal bar to get my power supply in, but it’s easy just a
few screws.
The tool-less PCI locks are not
the greatest, but then again I’ve never really found any like these
that actually work well, I always end up using screws to hold my
video cards in place.
The HDD cage is nicely done, I
like the idea that the hard drives are backwards, most cases have the
HDD connections coming out the front of the cage, but these go out
the back and it makes cable management much easier and keeps the
cable out of the way.
I prefer my USB connections to be
on the front of my case but that’s a personal preference as my case
sits on the left side of my desk under a shelf on the wall. Though if
you’ve got the case inside of a desk compartment, having them on the
top like they are can make them difficult to reach at times.
Summary
and Comments:
The Thermaltake Xaser VI MX case
is a very nice case overall, I’ve got my main system in it right now
in fact and it will be staying there for quite some time. It’s well
made with lots of room for everything you need to put in it.
The case seems to keep the system
cool, at least it’s the same temps as my last case, no changes so
that’s a good thing.
The loud fan is easily overcome
just by swapping it out for something else, or some people might not
care about the noise level and can leave it be.
DragonSteelMods gives the
Thermaltake Xaser MX VI a 4.5 out of 5 score and our Recommended
Awards as well.


Pros:
-Looks cool
-Lots of room
-Easy to install system
-Cable management
-Well made
Cons:
-Loud fans
-Tool-less PCI clips not the best
solution
I
would like to thank Thermaltake for the chance to review the Xaser
VI MX and for their continued support of DSM.
review# 500